|
The butterfly save is undoubtedly the most important
technique for contemporary goaltending. However, not too many
goalies can have big wide butterflies like Roy. As a goalie coach,
I've been asked by a lot of goalies, coaches and parents about
how to increase the size of butterfly. Although I don't believe
the size of the butterfly is the most important asset to employ
butterfly style, it's still better to have wider butterfly. Wider
butterfly can give you some edge when you make tough saves, and
flexible knees can prevent you from get injured.
So, can you increase your width of the butterfly?
The answer is YES! First of all, you have to understand the mechanics
of the butterfly. It's not the JOINT OF THE KNEES and HIPS that
determine the width of your butterfly. Shapes and the constructions
of your joints DO have something to do with your flexibility,
but it's not a major factor. It's the muscles surrounding these
joints that determine the flexibility of your NKEES and HIPS AREA!
Do stretch muscles of your legs especially your groin area daily,
and you can see your butterfly gets a bit wider in one month!
|
|
Picture 1 shows you the stretch in the
Half Butterfly position. Stand on your knees (shoulder width apart),
right toe points straight backward, left toe points sideways to
your left. Your back should be straight, never sit on your legs.
Put your right hand on your right hip and push slowly out in front
(and to the ground) so you can feel your right groin area is well
stretched. Keep this position for 30 seconds and switch side.
Repeat 3 times each side.
|
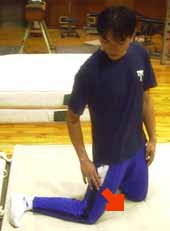
Picture 1
|
|
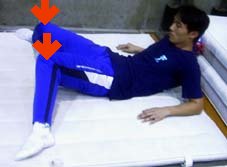
Next step is to sit in the position as Picture
2. The inside of your right knee should lay flat on the ground.
Try to push your right hip toward the ground slowly. Keep this
position for 30 seconds and switch side. Repeat 3 times each side.
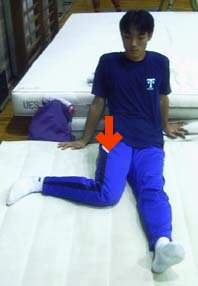
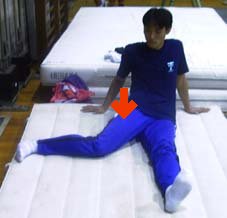
Picture 3 & 4 are the progressions
of the stretch before. Spread your right leg to the outside a
bit and do the same stretch (Picture 3). Lay down on your
back and do the same stretch (Picture 4).
|
Picture 2
Picture 3

Picture 4
|